Tag Archives: cake

Easter Project: Cake Pops!

29 Mar

059b-2 copy2

Here it is, our last easter project: Chick & bunny cake pops!

I was thrilled to use my cake pop machine for the very first time! I used a regular vanilla cake recipe (with butter, not oil) and simply substracted a little bit of milk to make sure the batter was quite thick. See the results… Beauuutiful! The best part was how amazingly round and perfect those little balls of cake were! They were already cute as is… BUT, they would eventually be even cuter with pretty bunny ears and bow ties! ^^

010-2

We used candy melts to secure the lollipop sticks in the cakes. Candy melts are easy-to-melt wafers, ideal for dipping cake pops. They come in a variety of colors and taste like very sweet white chocolate!  Make sure not to overheat yours like I did, because it will be unusable. Your chicks will end up looking like zombie heads. And I’m not joking- that thing was creepy.

Lucky me I had some more wafers at hand! Ha!

Using an empty egg carton to hold them straight proved to be a very efficient method! Off to the freezer for 5 min. and they were ready to take a dip!

033

And because making bunny and chick cake pops wasn’t nearly enough, we decided to make a CRAZY CUTE garden display as well!

With a block of oasis foam, hot glue, coffee sticks, green paper, easter eggs from the dollar store and a little bit of patience, it’s amazing what you can do!

003b

While Catherine worked on the garden, I worked on the bunny ears. All there was left to do was assemble it all… and take a bite! Or two!

Isn’t this a good-looking chick or what? Awww!

051

043-3

Happy Easter everyone!

Busy with gnomes, guitars and pills…

15 Mar

019-2 copy

It’s been a week since we’ve posted anything on this blog. Life has been busy with fun things such as days off, extensive mother-daughter shopping, diner out with family and much more – meaning cakes.

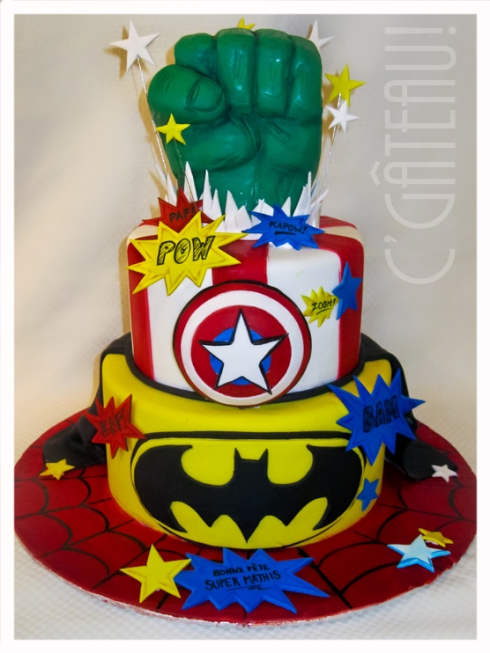
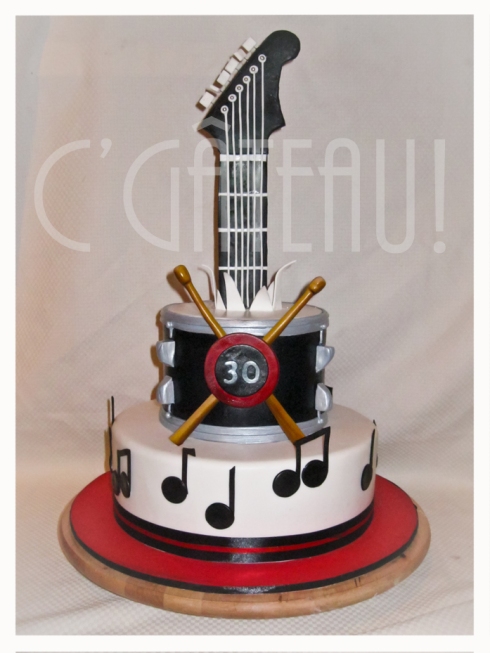
There was also quite a bit of working involved in postponing the bunch of DIYs I have in mind, so I thought it would be fun to finally show you what I do for a living. You probably already know that I’m a cake artist. Now is the low season, but it is my favorite since all the cakes I am asked to make are crazy fun birthday cakes! No plain white wedding cake these days. More like bright colored sculpted ones – my favorite!!!

This gnome is so incredibly cute! Definitely one of my favorites lately… I wanted to keep him for myself!

035-2 copy

This is another one that I really like. I love the mix of bold colors and had so much fun carving the fist out of yummy chocolate cake (carving=lots of leftovers, hehe).

028-2 copy

This cake was for a set of twins; one is a paramedic, the other one is a nurse.

IMG_0915-2 copy

This 25 servings vanilla cake-chocolate ganache-hazelnut buttecream dino was so fun to make! I created it from scratch as I couldn’t find a triceratops picture that I liked and I am very pleased with the results. Isn’t he adorable?

009-2 copy

This one is my latest one. It was so tall it wouldn’t fit in the fridge.

051-2montage-2 copy

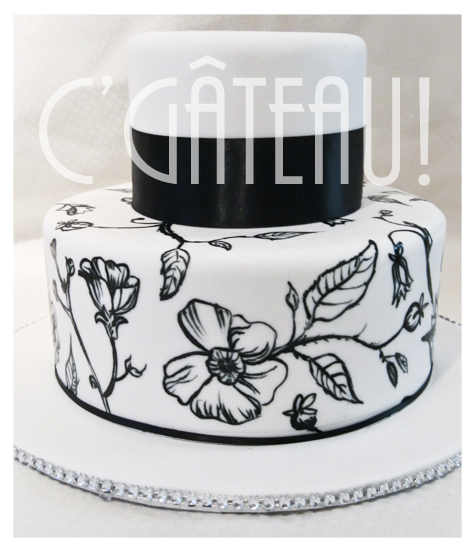
And last but not least, two little pretty ones! I love girly cakes! This was my first attempt at gumpaste orchids. The cake on the bottom is handpainted. I was for one of my girl friend’s birthday.

002-3 copy

I hope you have a beautiful weekend!

Cheese Cupcake with Graham Crust, Oh My!

21 Feb

076-2 copy

In my opinion, the best part of cheesecake is definitely the graham crust. I love all deserts involving graham crackers and firmly believe that graham crust is the most delicious thing IN THE WORLD after lemon curd. I know, I’m weird.

When I saw a cupcake recipe that involved that delicious crust, BAM! I knew this was going to be, for sure, my new favorite cupcake recipe.

060-3

Being around buttercream all the time (because I’m a cake artist), regular buttercream cupcakes don’t appeal to me as they once did. Buttercream’s good… but cheesecake is better! hehe!

SO, here’s the recipe:

Cheesecake Style Cupcakes

  • 180 g  (1 1/2 cup) graham crackers ( crumbled)
  • 75 g (1/3 cup) melted butter
  • 250 g (8 oz.) cream cheese
  • 3 eggs (whites and yolks separated)
  • 60 ml  (1/4 cup) milk
  • 100g (1/2 cup) sugar
  • 40 g (1/4 cup) all-purpose flour
  • 1 tsp baking powder

1) Preheat the oven (350 F / 180 C)

2) In a large bowl, mix the graham crumbles and the melted butter

3) Put the mixture in the cupcake liners and press firmly. The crust as to be compact. MY TIP: I used an old nutella glass container. I fit perfectly into the cupcake cavities!

062-2

4) With an electric mixer, mix together the cream cheese and the milk. MY TIP: I put the cream cheese 15 sec. in the microwave to soften it up to make sure the mixture is as smooth as can be!

5) Add half of the sugar, the egg yolks, the flour and the baking powder. Mix.

6) In another bowl, mix the egg whites until they are light and fluffy and add the remaining sugar.

7) With a spatula, gently mix the egg whites with the cheese mixture.

8) Fill the cupcakes liners a little over 3/4. The batter won’t rise very much.

9) Cook for 15 minutes until your mini cheesecakes look like those:

068-2

Finally, be patient and let cool!! They’re definitely better once they’re cool, as the crust will hold itself together instead of falling completely apart when you take your first bite … true story.

As for the topping, I opted for a drop a yogurt and fresh lemon zest. The mix of the graham crust and the citrus reminds me of a key lime pie! AND, I can almost make myself believe I’m eating healthy stuff.

Another great toping would have been whipped cream and raspberries, or even a homemade raspberry coulis!

…That’s it, I’m having another one!

084-2 copy

Buttercream Perfection

30 Jan

buttercream

As a cake decorator, friends often ask me about stuff. Sweet stuff. If you’re a wannabe cake artist, there is one basic recipe you ought to know and that is buttercream! Although it is a basic, it is pretty easy to mess up, so I thought I’d share with you my favorite Swiss Meringue Buttercream recipe.

Here’s what you’ll need:

  • a mixer (either a hand mixer or (even better) a stand mixer)
  • a whisk
  • a bowl
  • a spatula
  • 185g of egg white (use fresh eggs, they work better than egg whites cartons)
  • 370g of sugar (white, fine sugar)
  • 1 lb of unsalted butter

1. Whisk egg whites and sugar into a large bowl and let it stand above a bain-marie until the sugar is completely dissolved to the touch. Don’t let the bain-marie boil to hard and whisk often to avoid the whites from cooking. It is better not to use the mixer bowl for this step, as the temperature will be longer to decrease during the next step of the recipe.

2. Pour the mixture into the mixer bowl, and whisk at high speed for about 10 min. or until your meringue is firm (as shown on picture), and as reached room temperature.

3. Cut the butter into large cubes. If the butter is too cold, you can soften it up a little bit in the microwave (10-15 sec.). Don’t melt it because it will be unusable. I usually take it out of the fridge in advance so that it can almost reach room temperature. Way safer! Throw the cubes in the mixer one by one, still mixing at high speed. The mixture might fall a little (become more liquid) if your meringue was still on the “hot” side when you started to put the butter in, but don’t stop mixing just yet! Mix until the texture is uniform, light and fluffy, as shown on the picture!

4. Scrape the bowl to make sure there is no little piece of butter stuck at the bottom, add vanilla, and mix one last time at full speed.

And VOILÀ!

I hope you enjoy it and make crazy cakes!